
A3 Problem Solving: Step-by-Step Beginner Guide
A3 Problem Solving is one of the most practical ways to turn messy problems into clear action — without endless meetings, “gut-feel” decisions, or vague improvement plans.
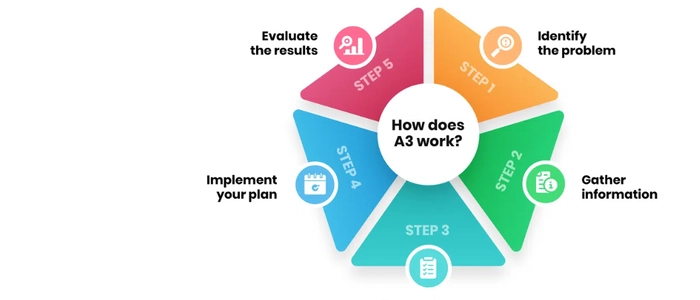
It’s a structured, one-page approach (traditionally on A3 paper) that helps a team define the real problem, identify root causes, choose countermeasures, and follow through with measurable results.
What Is A3 Problem Solving?
A3 is both a format and a mindset:
- Format: A single page that tells the full improvement story from problem to results.
- Mindset: A disciplined way of thinking — understand before acting, test ideas, learn fast, and standardize what works.
A3 is closely tied to PDCA (Plan–Do–Check–Act), which is why A3s tend to produce stronger follow-through than “action lists.” If you want a refresher on PDCA, start here: PDCA Cycle Explained (Plan-Do-Check-Act Guide).
When to Use an A3
A3 works best when:
- The same issue keeps repeating (quality defects, delays, missed deadlines, rework)
- You’re solving a cross-functional problem (multiple people/teams involved)
- You need alignment on “what’s really happening” before taking action
- You want improvements that stick (not quick fixes that fade)
The A3 Structure (Beginner-Friendly)
Most A3s include these sections (the wording varies, but the thinking is the same):
- Background
- Problem statement
- Current condition
- Goal / target condition
- Root cause analysis
- Countermeasures
- Implementation plan
- Follow-up / results
Step-by-Step: How to Build an A3
Step 1: Write the background (why this matters)
Keep this short and factual. Answer:
- What process/product/team is impacted?
- What is the business impact? (cost, lead time, customer experience, safety, morale)
- Why are we working on this now?
Step 2: Define the problem clearly (no solutions yet)
A strong problem statement is specific, measurable, and neutral. It avoids blame and avoids “solution language.”
Good example: “In the last 6 weeks, 18% of orders shipped late (target ≤ 5%). Most delays occur in the picking stage.”
Weak example: “Shipping is a mess and the warehouse needs better training.”
Step 3: Describe the current condition with evidence
This is where most teams level up. Instead of opinions, capture facts:
- What is happening today? (numbers, frequency, timing)
- Where does the problem show up most?
- What does the workflow look like right now?
Helpful tools here include a simple flow sketch, a quick tally chart, photos, or a small table of recent data.
Step 4: Set a target condition (goal)
Your goal should be measurable and time-bound:
- “Reduce late shipments from 18% to ≤ 5% within 60 days.”
- “Reduce changeover time from 45 minutes to 25 minutes by end of month.”
Make sure the goal is realistic and clearly connected to the problem statement.
Step 5: Do root cause analysis (don’t skip this)
This is the “heart” of A3. If you jump straight to countermeasures, you’ll likely treat symptoms instead of causes.
Beginner-friendly ways to analyze root cause:
- 5 Whys: Ask “why?” repeatedly until you reach a cause you can control and verify.
- Cause-and-effect thinking: List possible causes across categories (people, process, tools, environment, materials, policies).
- Validation: Confirm causes with data or direct observation (not assumptions).
Important: A “root cause” should be something that, if addressed, prevents recurrence — not just explains a single incident.
Step 6: Choose countermeasures (testable changes)
Countermeasures are not “big initiatives.” They’re specific changes tied directly to verified causes.
Strong countermeasures:
- Remove the cause or reduce its impact
- Are testable (you can run a small experiment)
- Have a clear owner
- Have a measurable expected effect
Tip: If a countermeasure doesn’t connect to a root cause, it doesn’t belong on the A3.
Step 7: Build an implementation plan (who, what, when)
Turn countermeasures into an action plan with:
- Task
- Owner
- Due date
- Status
Keep it small and realistic. A3 is about execution, not documentation.
Step 8: Define follow-up (how you’ll know it worked)
This is where A3 beats most “improvement plans.” Decide upfront:
- What metric will improve?
- How often will we check it?
- What’s the expected trend?
- What will we do if results stall or backslide?
PDCA thinking matters here: you’ll likely learn something during implementation. That learning should update the A3 and improve the next cycle.
A Simple A3 Template (Copy This Structure)
- Background: (2–3 sentences)
- Problem: (clear measurable statement)
- Current Condition: (facts + data + workflow snapshot)
- Target Condition: (metric + date)
- Root Cause Analysis: (validated causes)
- Countermeasures: (cause-linked changes)
- Plan: (owner + due date)
- Follow-up: (what we measure + cadence + results)
Common A3 Mistakes (and How to Avoid Them)
- Writing solutions in the problem statement: define the problem first.
- No evidence for “root causes”: validate causes with observation or data.
- Too many countermeasures: pick a small set that targets the real drivers.
- No follow-up: decide how you’ll check results before you implement.
- Using A3 as paperwork: A3 is a thinking process — the page is just the story.
Final Thoughts
A3 Problem Solving is a powerful way to create alignment and real improvement — especially when teams feel stuck in recurring issues or reactive firefighting.
If you keep it simple, stay evidence-based, and commit to follow-up, A3 becomes more than a document. It becomes a repeatable improvement habit.
Next recommended read: PDCA Cycle Explained (Plan-Do-Check-Act Guide)