
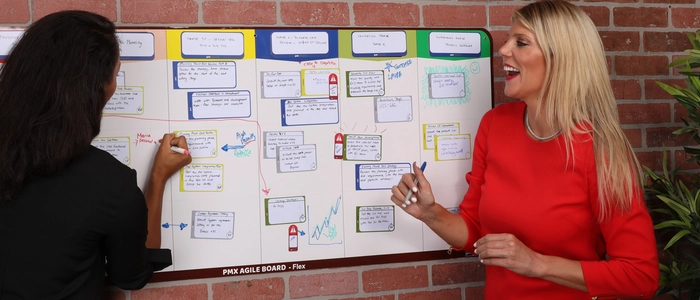
How to Build a Kanban Board (Step-by-Step)
If you want a simple system to organize work, reduce chaos, and finish faster, a Kanban board is one of the best tools you can build. This guide walks you through exactly how to build a Kanban board step-by-step—whether you’re setting it up for a team, a department, or even personal productivity.
You’ll learn how to design the workflow, choose the right columns, set WIP limits, create effective cards, and evolve your board using flow metrics—without overcomplicating it.
What You Need Before You Start
- A clear purpose: What kind of work will this board manage (projects, operations, support requests, improvement tasks)?
- A space everyone can see: A wall, team area, or home workspace.
- Cards and column labels: Sticky notes or reusable magnetic cards work best.
- A shared agreement: The board must represent reality (not “what we hope is happening”).
If you’re brand new to the method, start here first: What Is Kanban? A Complete Beginner’s Guide.
Step 1: Define the Work You Want to Manage
A Kanban board is only useful if it represents a real workflow. Before drawing columns, answer two questions:
- What work belongs on the board? (Requests, tasks, features, orders, changeovers, maintenance work, etc.)
- What is “done”? (Delivered to customer, shipped, deployed, approved, verified, invoiced, etc.)
Tip: Start small. Don’t try to track every possible activity on day one. Pick a single value stream or work type.
Step 2: Map Your Workflow Stages
Now translate your real process into stages (columns). Most teams start with a simple flow like:
- Backlog (ideas / requests waiting)
- Ready (clear, prioritized, prepared)
- In Progress (actively being worked)
- Review / Test (verification, approvals, QA)
- Done (complete and delivered)
If your work has clear handoffs (design → build → test, or request → approve → execute), add those stages so waiting becomes visible. A board isn’t meant to “look clean”—it’s meant to show where work actually lives.
Step 3: Add a “Blocked” Signal (So Waiting Can’t Hide)
Most delays are not caused by effort. They come from waiting. Make waiting obvious by adding one of these:
- A dedicated Blocked column
- A blocked tag or red indicator on the card
- A “Waiting for…” label (waiting on approval, parts, clarification, another team, etc.)
When blocked work is visible, your daily conversation becomes practical: remove blockers and restore flow.
Step 4: Set WIP Limits (This Is Where Kanban Starts Working)
Without WIP limits, a board becomes a pretty task list. With WIP limits, it becomes a flow control system.
Start with simple limits like:
- In Progress: 1–2 items per person
- Review / Test: 3–5 items total
The rule is simple: when a column hits its limit, you stop starting and help finish.
Use this companion guide to do WIP limits correctly: What Are WIP Limits? (And Why Most Teams Ignore Them).
Step 5: Design Cards That Actually Work
The card is your unit of work. If cards are vague, everything downstream becomes noisy.
A good Kanban card includes:
- Clear title: “Update onboarding email template” (not “Emails”)
- Owner: one person accountable
- Due date (optional): only when it truly matters
- Definition of done: what “complete” means for this card
If you want a full playbook for cards: Kanban Cards: How to Use Them the Right Way.
Step 6: Create Simple Policies (So Everyone Uses the Board the Same Way)
Kanban boards break when people interpret columns differently. Fix this by adding lightweight policies:
- Entry rules: what must be true before a card moves into “Ready”
- Exit rules: what must be true before a card moves into “Done”
- Blocked rules: when to mark blocked, and how quickly to escalate
Keep policies short. One sentence per column is enough to start.
Step 7: Add Swimlanes (Optional, But Powerful)
Swimlanes help you separate work by type or priority without creating multiple boards. Common swimlanes include:
- Expedite (true emergencies only)
- Standard (normal work)
- Improvement (Kaizen / process fixes)
If you’re unsure how to use them well, this guide helps: What Are Swimlanes? (Kanban & Agile Explained).
Step 8: Start Running the Board (Daily Habits That Make It Stick)
A Kanban board is only valuable when it drives decisions. Two habits make a huge difference:
- Daily check-in (5–10 minutes): focus on blocked items and finishing work in progress
- Weekly review (15–30 minutes): review flow issues, adjust WIP limits, and refine policies
Important: don’t manage people with the board. Manage the system. The board is a mirror—use it to improve the workflow, not to punish individuals.
Step 9: Improve the Board Using Flow Metrics
Once the board is running, you can improve it with simple, practical metrics—especially flow efficiency (how much time work is actively being worked vs waiting).
Start here: Flow Efficiency: The Metric That Shows True Productivity.
To level up your overall approach to visual work, see: Visual Project Management: Why Seeing Work Beats Tracking Work.
Examples and Inspiration (So You Don’t Overthink the Layout)
If you want to see how real teams structure their boards, use these examples to borrow patterns and avoid common mistakes:
Product Tie-In: Build Your Board Faster with PMXBOARD Kanban Board Sets
If you want to build a clean, professional board without the setup hassle, a dedicated physical Kanban set helps you get to “usable” immediately. PMXBOARD’s Kanban Board Sets are designed for durable daily use with modular workflow stages and reusable magnetic cards.
Once your board is visible in your workspace, the system becomes part of how you think—making priorities clearer and progress easier to maintain.
Next Steps
- Start with a simple workflow (Ready → In Progress → Review/Test → Done)
- Add WIP limits and a blocked signal
- Run daily check-ins that focus on finishing, not starting
- Use flow metrics to improve the system over time
That’s how you build a Kanban board that actually changes outcomes—not just a wall full of sticky notes.